Switch Panel Initial Prototype
Christopher Edwards
Building a Cessna 172 Switch Panel
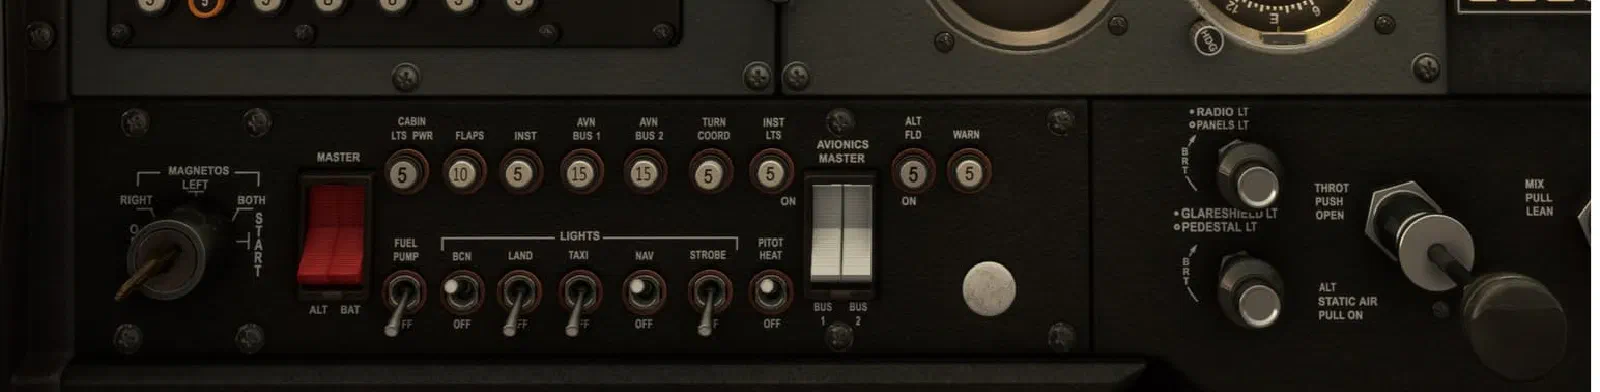
One of the first things I wanted to tackle in building my custom Cessna 172 simulator was the switch panel.
At first, this might seem like a relatively simple part of the project. There are plenty of simulator switch panels available, and electrically, most of the controls are not particularly complicated. But I wasn’t just looking for a collection of switches that could send commands to X-Plane.
I wanted the controls to look and feel more like the controls in a real aircraft.
The simulator is intended to reflect the Cessna 172 I became familiar with during flight training, and one of the secondary goals of the project is to reinforce flight-training workflows through repeated physical interaction with the controls and checklist procedures.
That meant the physical controls themselves were an important part of the design.
Why Build a Custom Switch Box?
There are already many products available for flight simulation that provide power and avionics switches. They work, and they can provide the necessary electrical inputs to the simulator.
But when I looked at the available options, I found that the switches used in many of these products didn’t have the same look and feel as those in real aircraft.
For this project, that distinction matters.
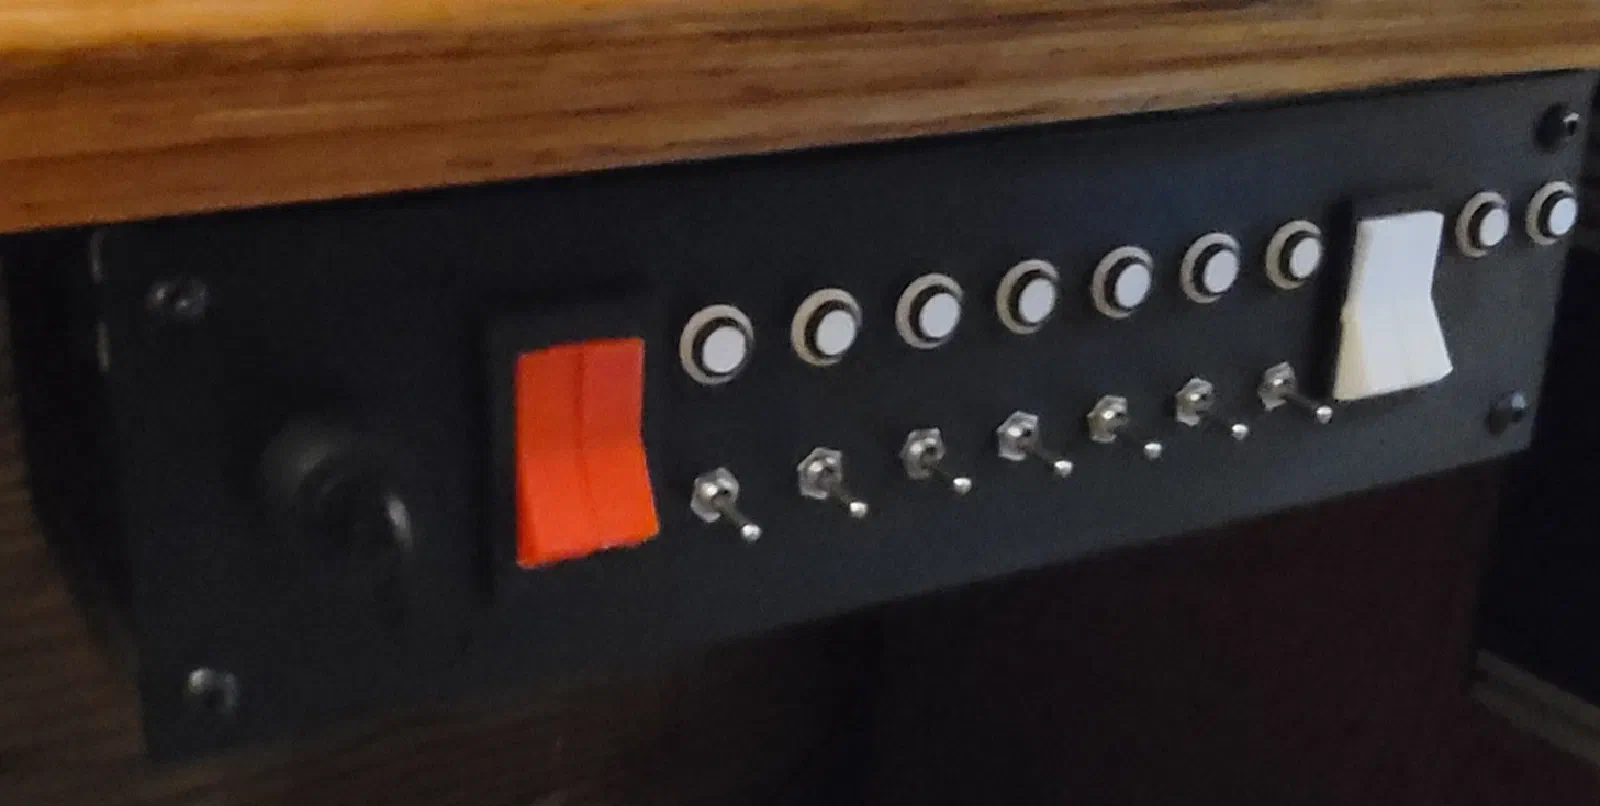
I wanted the switch box to have the right general arrangement and, as much as practical, reproduce the physical interaction of the aircraft controls. That includes things such as:
- The appearance of the toggle switches
- The shape and size of the switches
- Switch spacing and arrangement
- The physical travel of the controls
- The feel of operating the switches
- The distinctive operation of the magneto
- The overall appearance of the panel
This became one of the first design requirements for the project:
The controls should reproduce the physical experience of the aircraft as closely as reasonably practical, rather than simply reproducing their electrical functions.
That requirement would influence both the mechanical design and the electronics.
Initial Requirements
Before building anything, I defined a basic set of requirements for the first prototype.
The switch box needed to:
- Reproduce the general power and avionics switch arrangement of the C172
- Use custom aircraft-style toggle switches
- Include a functional five-position magneto
- Support the OFF, RIGHT, LEFT, BOTH, and START positions
- Have a spring-loaded START position that returns to BOTH
- Interface with X-Plane 12
- Use inexpensive and readily available electronics for the initial prototype
- Allow the mechanical controls to be refined independently of the final electronics
- Provide a foundation for eventually moving to custom PCBs and purpose-built hardware
The last two points are particularly important.
This isn’t intended to be a one-and-done project. The first version is a prototype that will help establish what works, what doesn’t, and what needs to change before I commit to custom electronics and more refined mechanical components.
Designing the Controls in Fusion 360
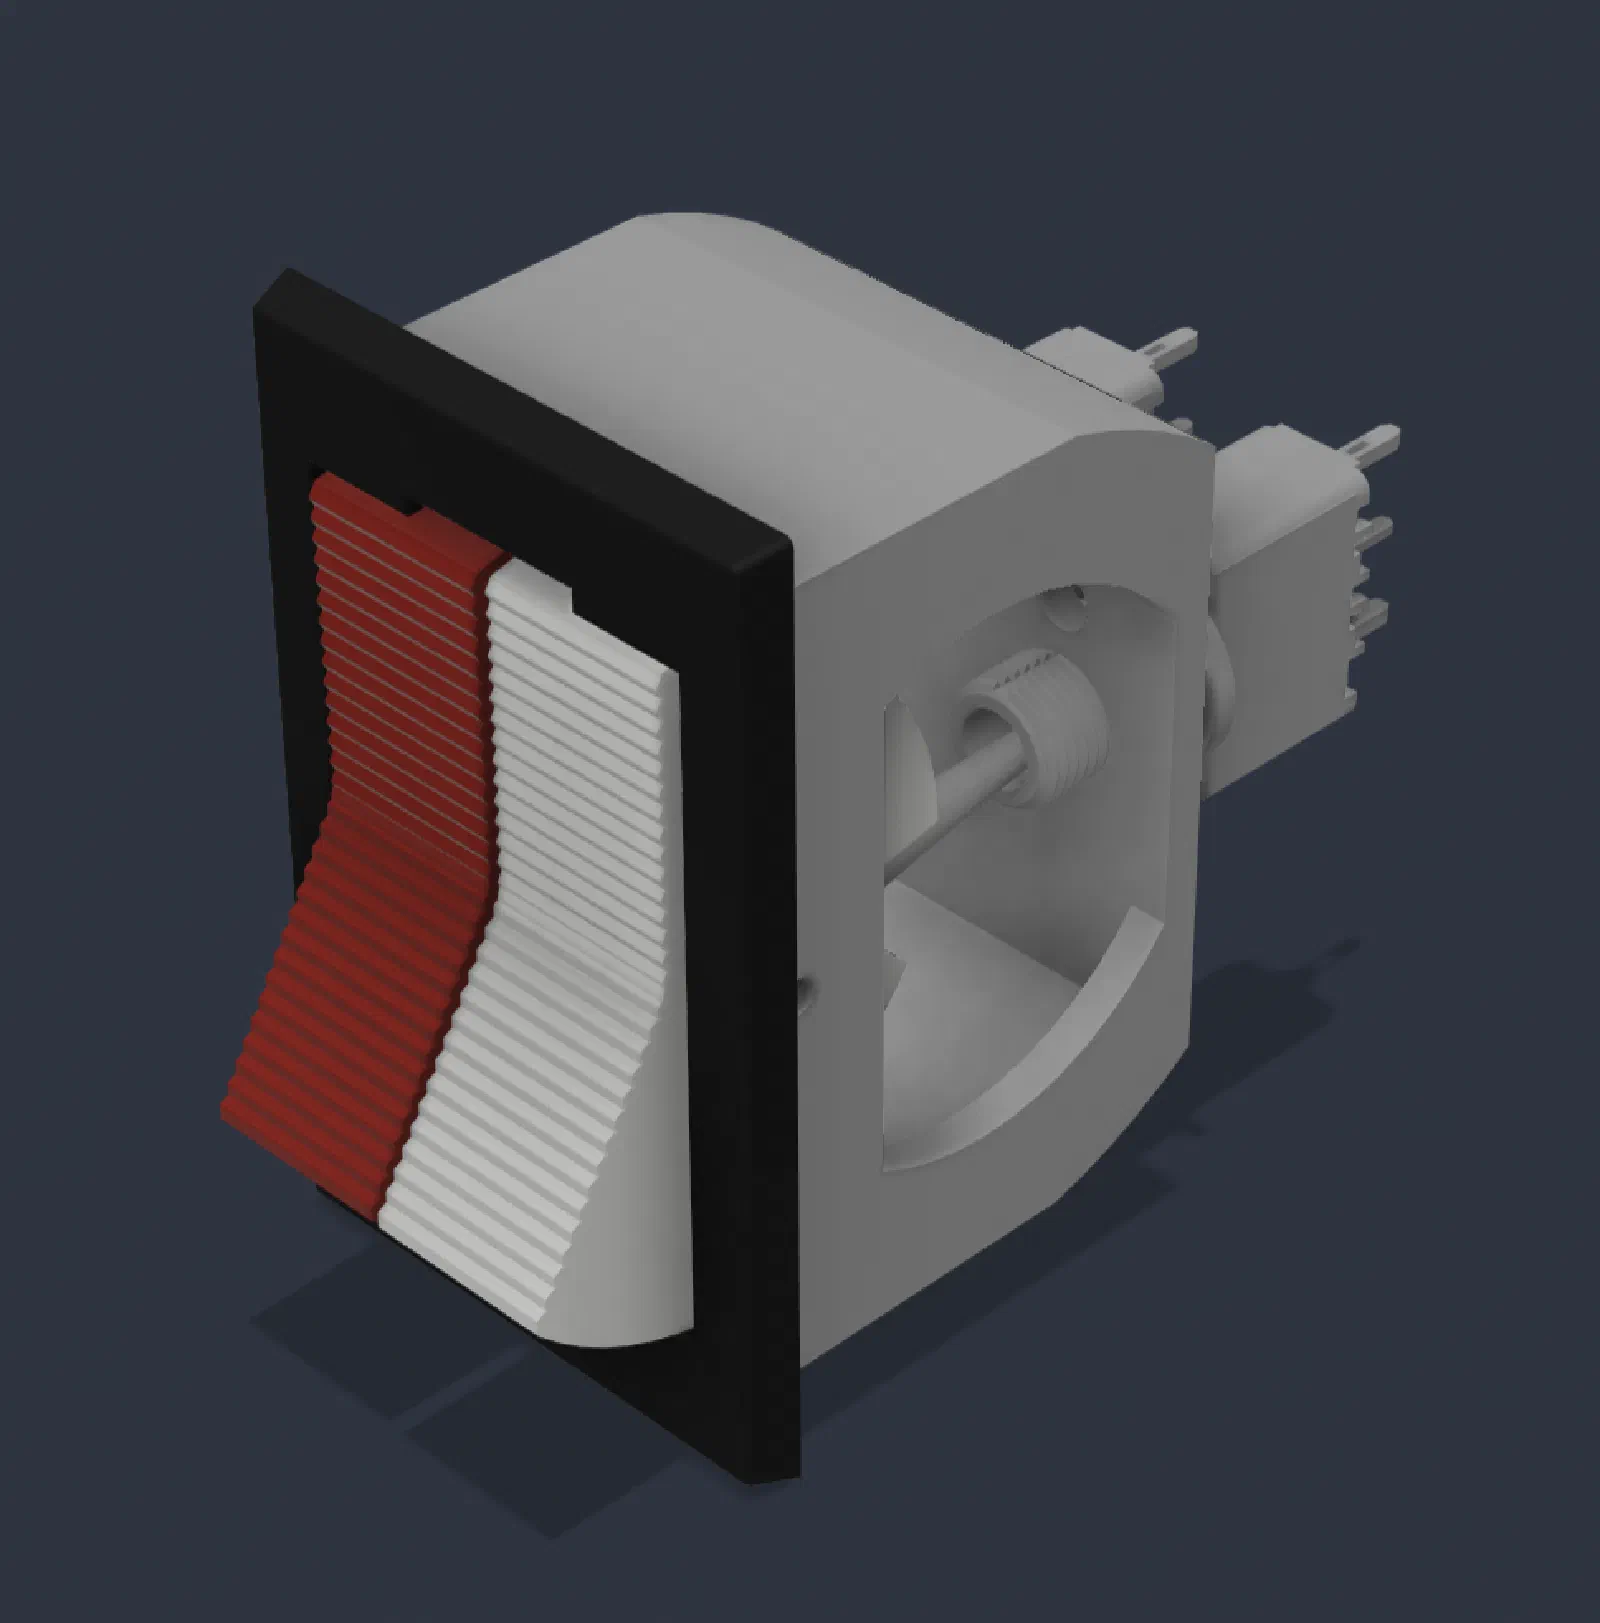
Rather than trying to find an off-the-shelf switch that looked close enough, I decided to design the aircraft-style toggle switches myself.
I built the switch components in Fusion 360, allowing me to control the geometry and dimensions of the physical parts rather than being constrained by whatever commercial components happened to be available. There are very similar designs out there that I took inspiration from.
This approach also fits the larger philosophy of the simulator project.
I’m not trying to reproduce every component exactly down to the last detail. Instead, I’m trying to identify the characteristics that make a control recognizable and natural to operate, then reproduce those characteristics in a practical way.
Designing the switches myself also gives me something that an off-the-shelf component doesn’t: the ability to continue refining the design.
If the toggle shape needs to change, the mounting needs to be adjusted, or the switch needs a different operating feel, I can modify the model and produce another version.
The Magneto Challenge
The magneto was a more interesting mechanical problem.
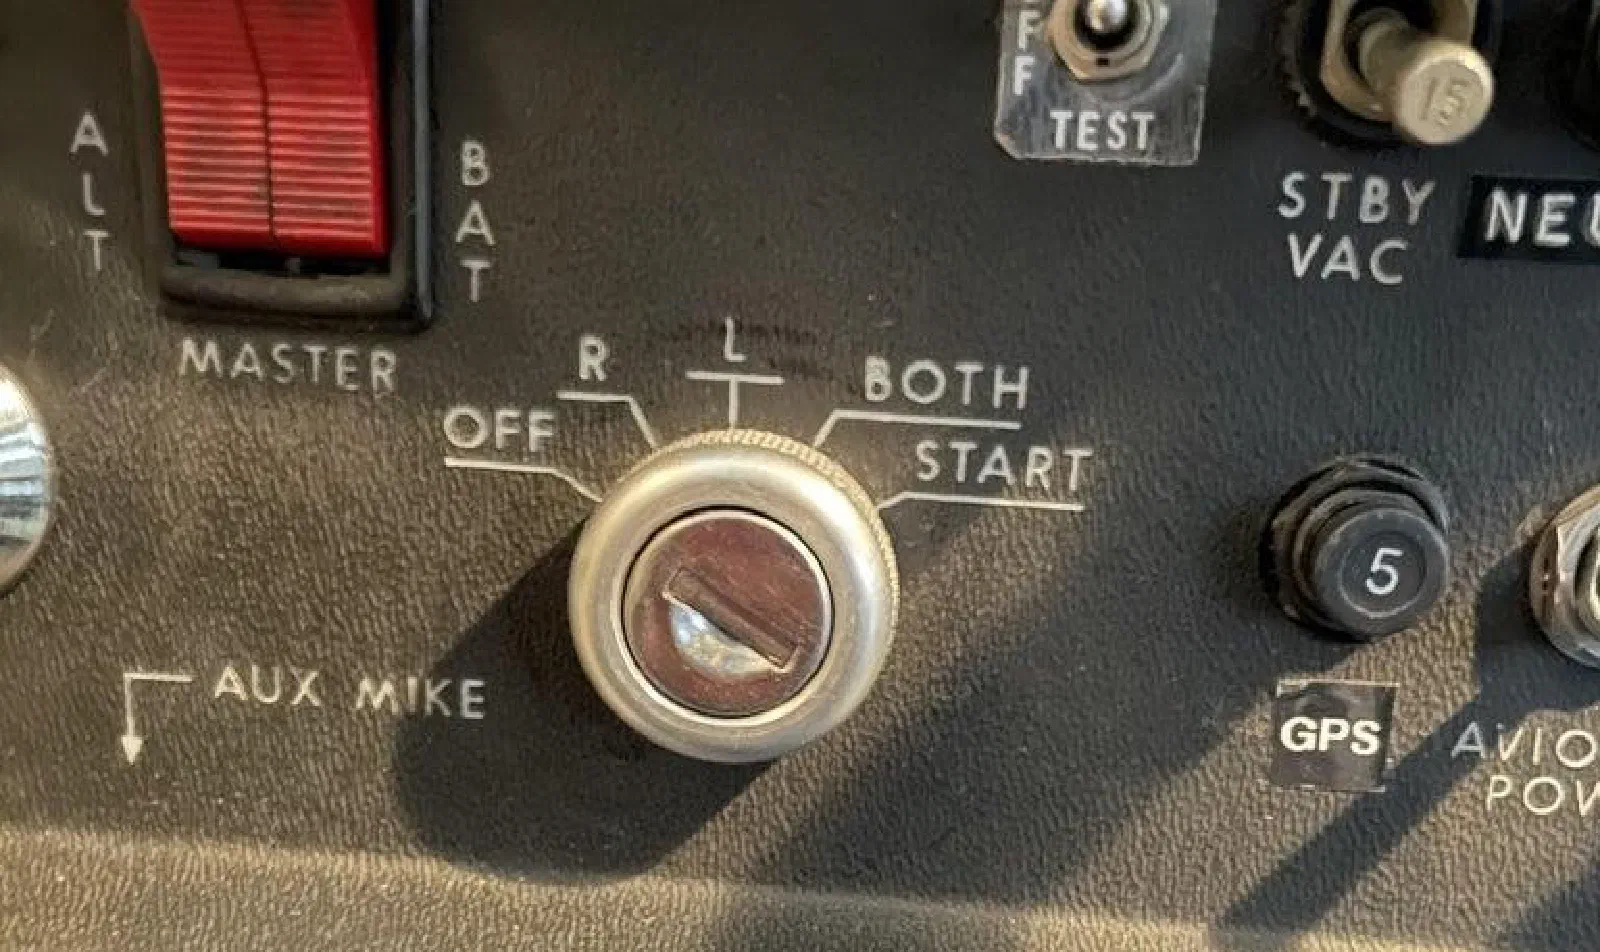
The C172 magneto has five distinct positions:
OFF → RIGHT → LEFT → BOTH → START
The START position is spring-loaded. When the key is released, it returns to BOTH.
That makes the magneto considerably different from simply reading a group of independent toggle switches. The physical mechanism needs to provide both the different rotational positions and the spring-loaded behavior of the START position.
I researched commercially available magneto solutions, but the options I found didn’t quite meet what I wanted for this project.
So, like the toggle switches, I designed my own magneto in Fusion 360.

The current design is a good starting point, but it is also one of the areas where I know more refinement will be needed. In particular, I want to improve the mechanical feel and operation so that rotating the magneto feels more natural and more closely resembles the aircraft control.
That’s one of the advantages of building a prototype first: I don’t have to pretend that the first mechanical design is the final design.
I can build it, use it, identify what doesn’t feel right, and then change it.
Prototype Hardware
For the first electronic prototype, I chose an ATmega32U4-based Pro Micro.
The board is inexpensive, readily available, and has more than enough capability for the initial switch box.
Another useful feature is the ATmega32U4’s native USB capability. It can present itself to the computer as a USB HID device, allowing the switch box to appear as a USB joystick.
That makes the basic system relatively straightforward:
Physical control → ATmega32U4 → USB HID → PC → Sim
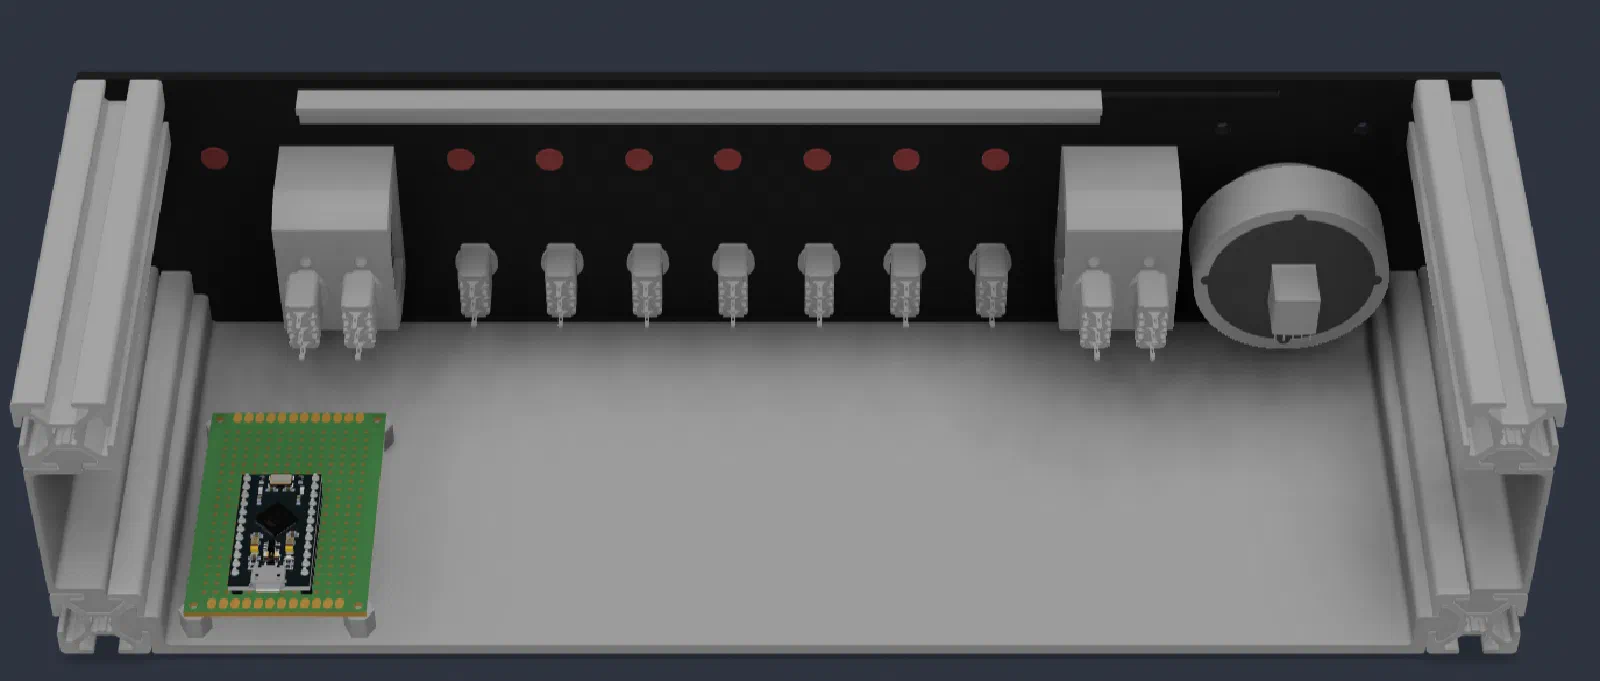
The prototype hardware consists of:
| Component | Purpose |
|---|---|
| ATmega32U4 Pro Micro | USB HID controller |
| Custom aircraft-style toggle switches | Power and avionics controls |
| Custom magneto | OFF/RIGHT/LEFT/BOTH/START control |
| USB connection | PC interface |
| X-Plane 12 | Flight simulation |
The ATmega32U4 is intentionally a prototype platform rather than the final hardware.
It makes experimentation easy and keeps the cost of early hardware development low. I can change the wiring, modify the firmware, and test different mechanical designs without having to design and manufacture a custom PCB for every iteration.
However, the development board also comes with limitations.
As the simulator grows, I expect to need more inputs and outputs, additional types of controls, indicators, displays, and other cockpit electronics. A general-purpose development board isn’t necessarily the best architecture for that kind of system.
The eventual goal is therefore to move from the development board to custom-designed PCBs and purpose-built electronics.
For now, though, the ATmega32U4 provides exactly what I need: a way to prove the concept.
Firmware With PlatformIO
The firmware was developed using PlatformIO in Visual Studio Code.
Although the Pro Micro is Arduino/Leonardo compatible, PlatformIO gives me a more structured development environment and fits better with the way I want to manage the project as it grows.
The firmware is responsible for reading the physical controls, determining the magneto state, and presenting the switch box to the computer as a USB HID joystick.
The basic software architecture is intentionally simple:
Physical controls ↓ ATmega32U4 firmware ↓ USB HID joystick ↓ Windows PC ↓ X-Plane 12
Keeping the interface as standard USB HID also means that the prototype doesn’t need a specialized PC-side application just to communicate the basic switch states.
Source Code
The firmware and supporting project files are available on GitHub:
Cessna 172 Switch Box — GitHub
The repository will evolve along with the hardware as the project moves from the initial prototype toward custom electronics.
Prototype Results
The first version successfully demonstrated the basic concept.
I was able to build the aircraft-style toggle switches and magneto, connect them to a single ATmega32U4 controller, and use the resulting USB HID device with X-Plane 12.
That may sound like a relatively small milestone, but it establishes several important pieces of the project.
The physical controls can be manufactured.
The magneto concept works.
The electronics can read the controls.
The firmware can translate those physical inputs into a USB device.
And X-Plane can interact with the resulting controller.
More importantly, the prototype gives me something that a CAD model alone can’t provide: something I can actually operate.
That makes it possible to evaluate the mechanical feel, spacing, ergonomics, wiring, and overall interaction with the simulator.
Lessons Learned
One of the biggest lessons from this first prototype is that reproducing an aircraft control isn’t simply an electrical engineering problem.
A switch can be electrically correct and still feel completely wrong.
The physical characteristics matter:
- Shape
- Size
- Spacing
- Travel
- Resistance
- Mounting
- Mechanical feedback
- Location within the panel
These details become particularly noticeable when the controls are used repeatedly.
The magneto reinforced this even more. Its electrical state is relatively simple to represent, but reproducing the physical interaction requires considerably more thought.
The electronics provided another lesson.
An inexpensive development board such as the ATmega32U4 Pro Micro is extremely useful during early development, but it isn’t necessarily the right solution for the finished simulator.
That’s not a problem with the board. It is doing exactly what I need it to do at this stage.
The prototype is helping me discover the requirements for the hardware that comes next.
Prototype → Next Version
The first prototype establishes the foundation for the next iteration.
Current Prototype
- Custom aircraft-style toggle switches designed in Fusion 360
- Custom magneto designed in Fusion 360
- Single ATmega32U4-based controller
- Hand-wired electronics
- USB HID interface
- X-Plane 12 integration
- Initial mechanical construction
Future Development
The next versions will focus on both mechanical and electrical improvements.
On the mechanical side, I want to continue refining the magneto, particularly its operating feel. The toggle switches can also be refined as I gain experience with the physical design.
On the electronics side, the ATmega32U4 development board will eventually be replaced by custom-designed PCBs and purpose-built controller hardware.
That will allow the electronics to be designed around the simulator’s actual requirements rather than adapting the simulator to the limitations of a development board.
The goal isn’t to replace the prototype simply because custom hardware is more sophisticated.
The prototype exists to answer questions and uncover problems early.
Once those lessons have been learned, they can be incorporated into the next hardware revision.
A First Step Toward a Custom Cessna 172 Cockpit
This switch box is only one part of the larger simulator project, but it establishes an important direction.
The goal isn’t simply to build a controller that makes X-Plane respond when a switch is flipped.
I want to build physical controls that make interacting with the simulator feel familiar to someone who has actually sat in the aircraft.
That means paying attention to the mechanical details, the layout, the electronics, and eventually the complete cockpit environment.
Starting with an inexpensive microcontroller and hand-built controls gives me the freedom to experiment without locking the project into an architecture too early.
The ATmega32U4 won’t be the final controller.
The first magneto won’t be the final magneto.
The first switch design won’t necessarily be the final switch design.
And that’s the point.
This is the first iteration of a much larger project.
The next step is to take what I’ve learned from this prototype and start turning it into hardware designed specifically for the simulator.